

Programming
To make an LED light up, programming is not necessarily required. However, when controlling a more complex electrical circuit, it is beneficial to use a microcontroller. The microcontroller requires a program code to know what it should do. Through the code, you provide instructions to the microcontroller on which sensors to read or when to play a sound.
The microcontroller
The microcontroller is equipped with a variety of input and output pins, which allow you to connect a wide range of sensors, actuators, and other electronic components. It also has a USB port that can be used for power supply and programming of the microcontroller.
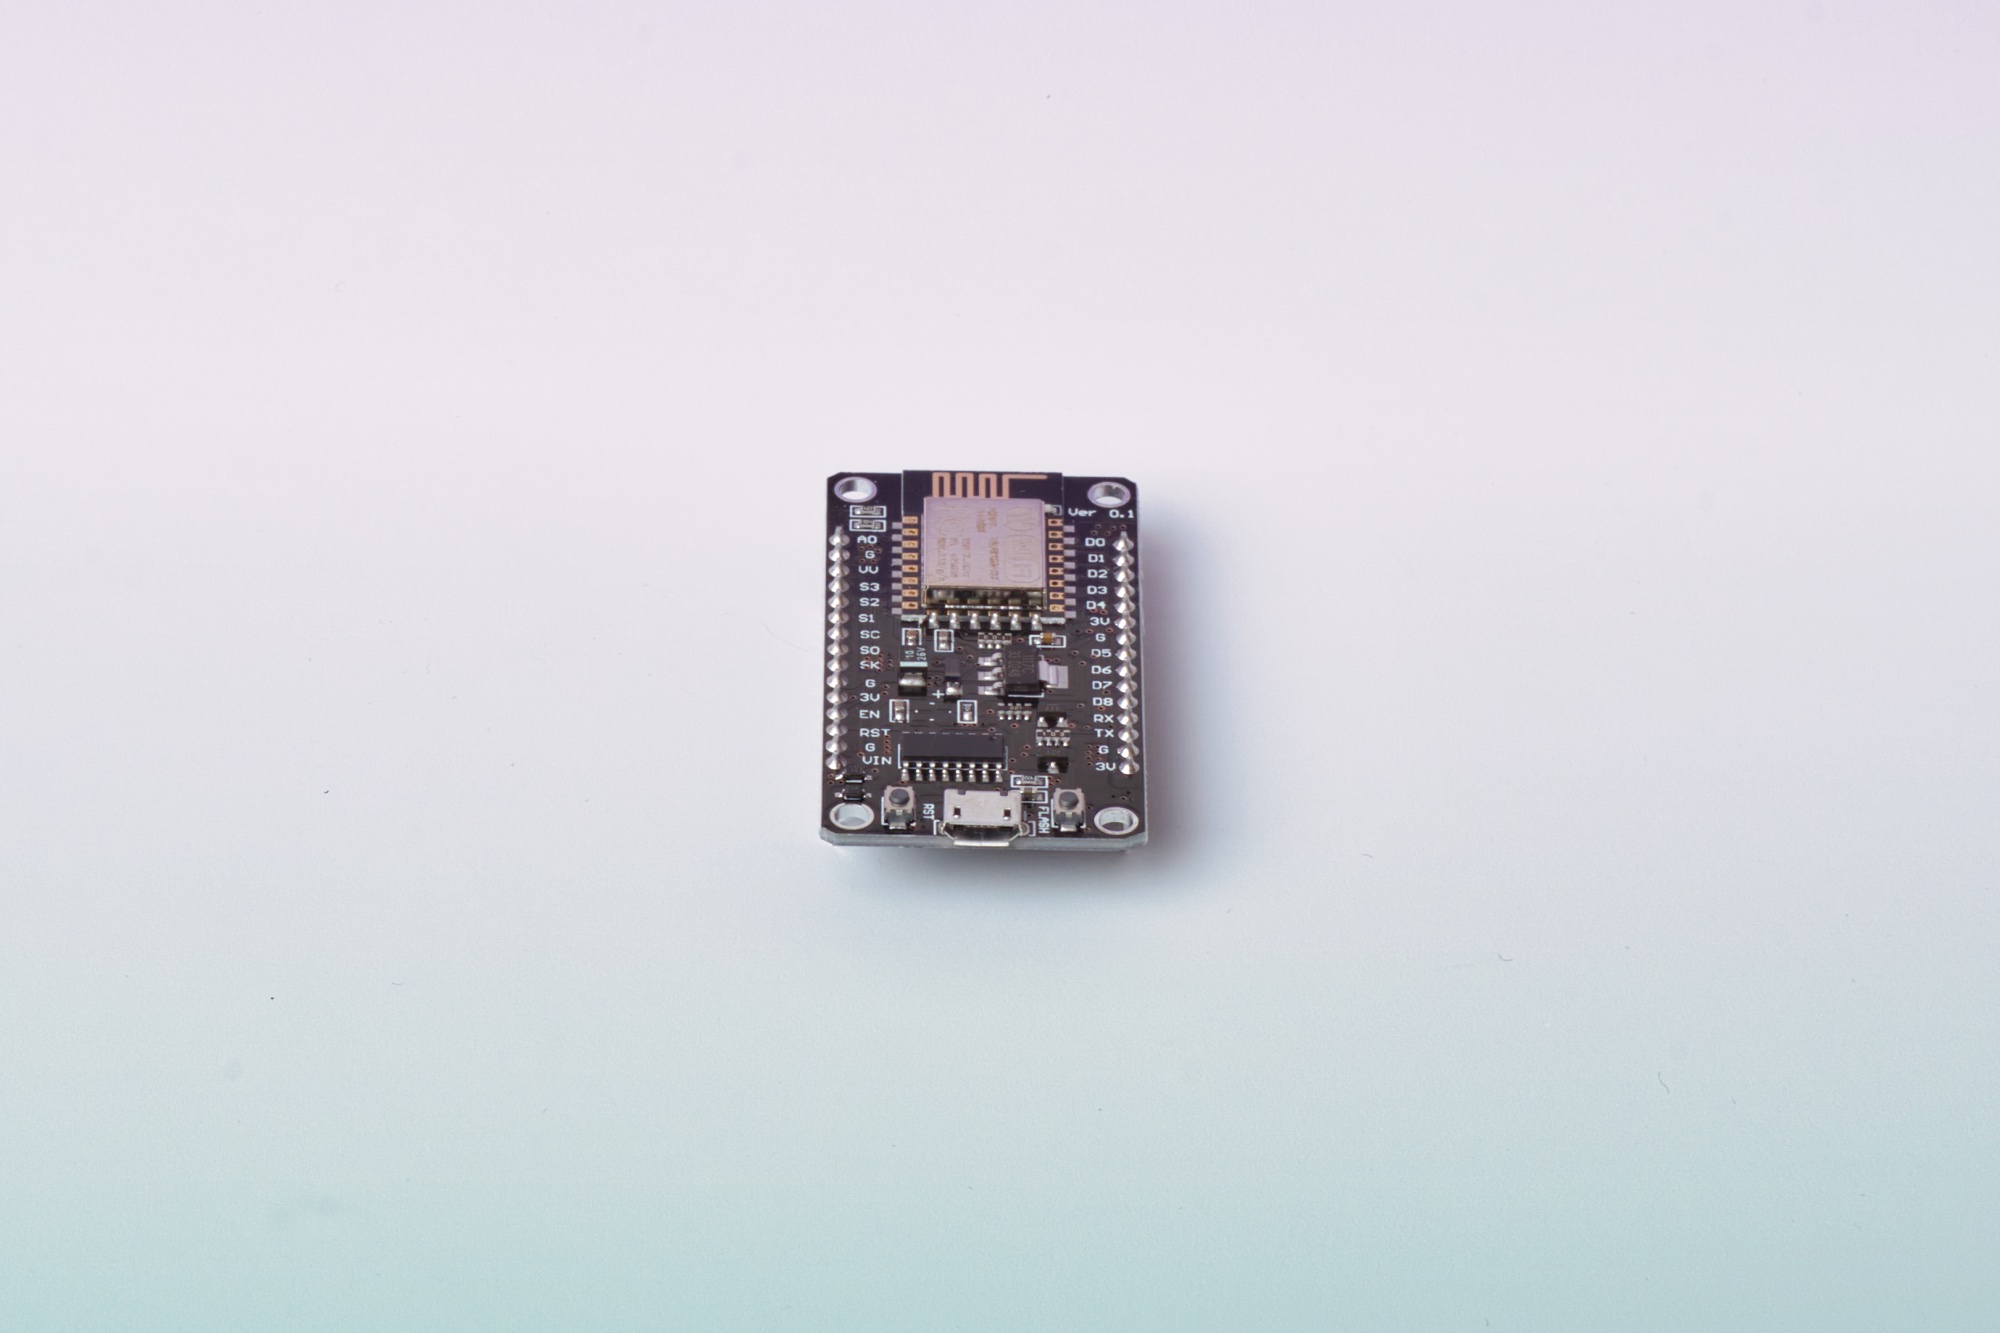
ESP8266 (NodeMCU):
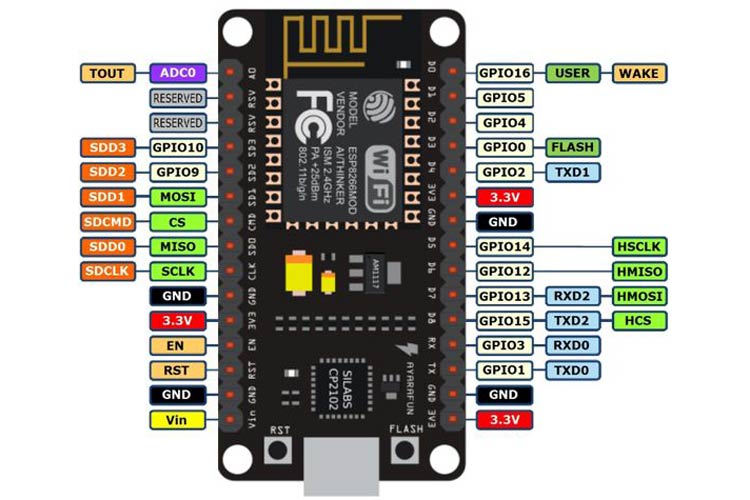
- Important Buttons:
- RST - used to reset the microcontroller
- Important Pins (some may appear multiple times):
- 3V - power supply for components that require 3V
- G - Ground (GND)
- VIN - power supply for components that require 5V
- D1 - D4, D5 - D8 - pins for reading digital values (0/1)
- A0 - pin for measuring analog values
Alternativ microcontrollers can be used, such as the ESP32 or Arduino Nano. However, the code will remain the same, and only the pin numbers may differ slightly.
ESP32:
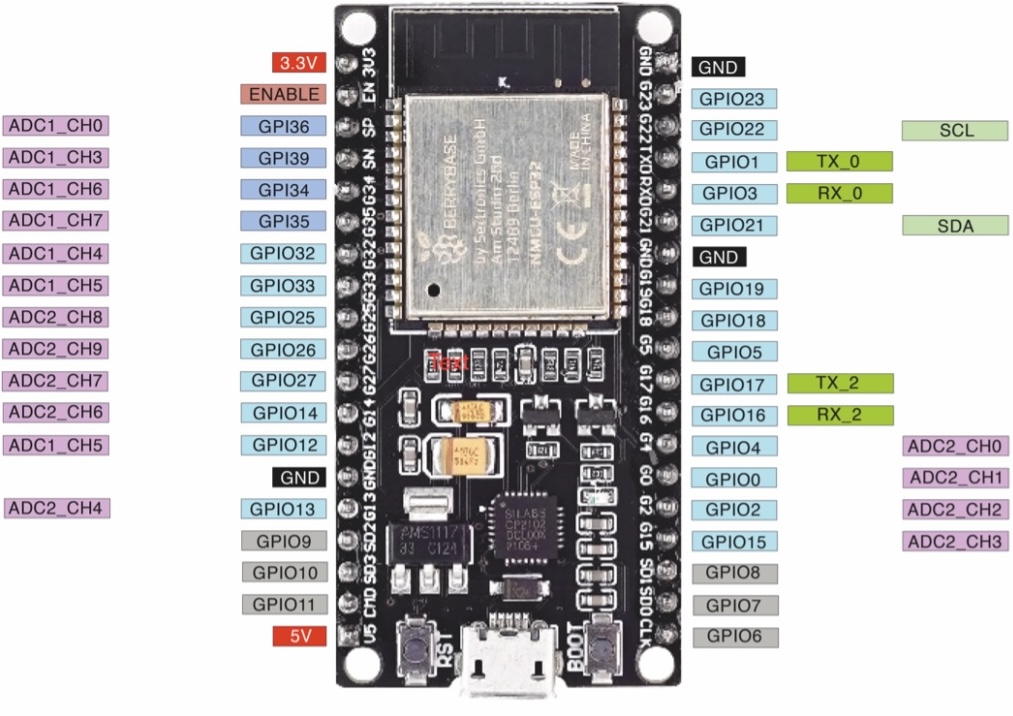
- Important Buttons:
- RST - used to reset the microcontroller
- Important Pins (some may appear multiple times):
- 3V3 - power supply for components that require 3V
- GND - Ground
- 5V - power supply for components that require 5V
- GPIO - pins (G) for reading digital values (0/1) as well as analog values
Arduino
Arduino is an open-source hardware and software platform that allows you to create interactive electronic projects. The platform consists of a range of microcontrollers and related development tools, including an integrated development environment (IDE) and a library of pre-written code snippets that make project development easier. However, in this context, we are only using the development environment and the Arduino libraries. It’s good to know that when people refer to Arduino, they may be referring to both the Arduino board and the software or Arduino libraries. Instead of the Arduino board, we are using the ESP8266 board or ESP32 as our microcontroller, even though we will continue to refer to it as the Arduino board throughout the process.
The Arduino Integrated Development Environment (IDE)
The IDE (Integrated Development Environment) is a software that provides programmers with a collection of essential tools for software development in a single interface. It simplifies tasks related to programming, such as creating programs, debugging code, and other activities associated with programming.
In the case of the Arduino IDE, it allows for easy uploading of code to the microcontroller through a menu or button. It also provides a convenient way to display the serial output of the microcontroller, which provides information about the data being processed. Without this support, the developer would have to manually implement these functionalities.
There are various IDEs available for different programming languages and platforms. Each IDE is tailored to the specific needs and requirements of the programming language or platform it supports.
The programming language
The programming language used in the Arduino IDE is a variant of the C++ programming language specifically adapted for writing code for Arduino boards.
The programs written in the Arduino IDE are also called sketches. The files have the .ino extension and need to be compiled before being loaded onto the microcontroller. Compilation is a necessary step to translate the code into a machine-readable format that the microcontroller can understand.
The program flow
The program is executed from top to bottom. There are two functions that are predefined in every program:
- Setup: It is executed once.
- Loop: It is called in an endless loop.
After creating a setup() function that initializes the initial values (variables, pins, and libraries), the loop() function does exactly what its name implies. It is an endless loop that is called again after each iteration. This allows your program to modify variables, read data, or respond to it.
Variables
A variable stores a value to be used later in the code. You can think of it as a container where you can hold information of a certain type. You can assign a value to a variable using the ”=” operator, with the variable on the left and the value to be stored on the right. For example, “a = 42” would mean that the variable a holds the value 42. Variables are typically named using English language conventions.
int a = 42;Data types
You will find the data types int and book in our code.
The data type of a variable describes what type of data can be stored in the variable. If the data type is specified as “int”, numbers can be stored in the variable. If “bool” is specified before the variable name, then only two values, 0 or 1, can be saved.
int a = 42;
bool digitalValue = digitalRead(D1);
Functions
Functions are used to control the Arduino board and perform calculations. This means that a function groups together a series of instructions, calculations, and steps to make them easier to reuse. A function can have input and output.
Functions are typically named using English language conventions.
  // Set the specified pin as input or output.
  // In this example, you are instructing the microcontroller
  // that a value should be outputted at pin D0.
pinMode(D0, OUTPUT);- The syntax of the function is pinMode(pin, mode), where pin and mode are parameters of the function, the function inputs. They are passed to the function to perform a specific action.
- pin: The Arduino pin number on which to set the pin mode.
- mode: The mode of the pin. There are 3 types of modes: INPUT, OUTPUT, or INPUT_PULLUP.
If a function has a return value (output), you can store it in a variable to use it later.
Commands (Predefined Functions)
There are a number of predefined functions that you can use to give instructions to the microcontrollers. These functions are grouped together in a library.
The documentation provides detailed explanations of each command, including its syntax, parameters, and usage examples.
Loops
Loops allow for the repetition of calculations and instructions. With a loop, you can specify that something should be repeated a certain number of times.
Comments
If you want to make notes in your code or tell the microcontroller to ignore a certain part, you can comment out the lines of code.
 // Using two slashes before the text is how you start a comment in the code.
 // Attention: This comment will only apply to a single line.