Action: Building a Cursing Plant
Great! You have already learned a lot, and now we can move on to building our cursing plant.
Short overview what we will do:
- We will use a moisture sensor to measure the moisture in the plant pot.
- We will use a motion sensor to detect movement near the plant.
- We will use a DFPlayer and speaker to play a sound.
- We will connect all the sensors and output devices to the microcontroller.
- We will write a program that reads the sensor values and sends a signal to the DFPlayer at the right time to play a sound.
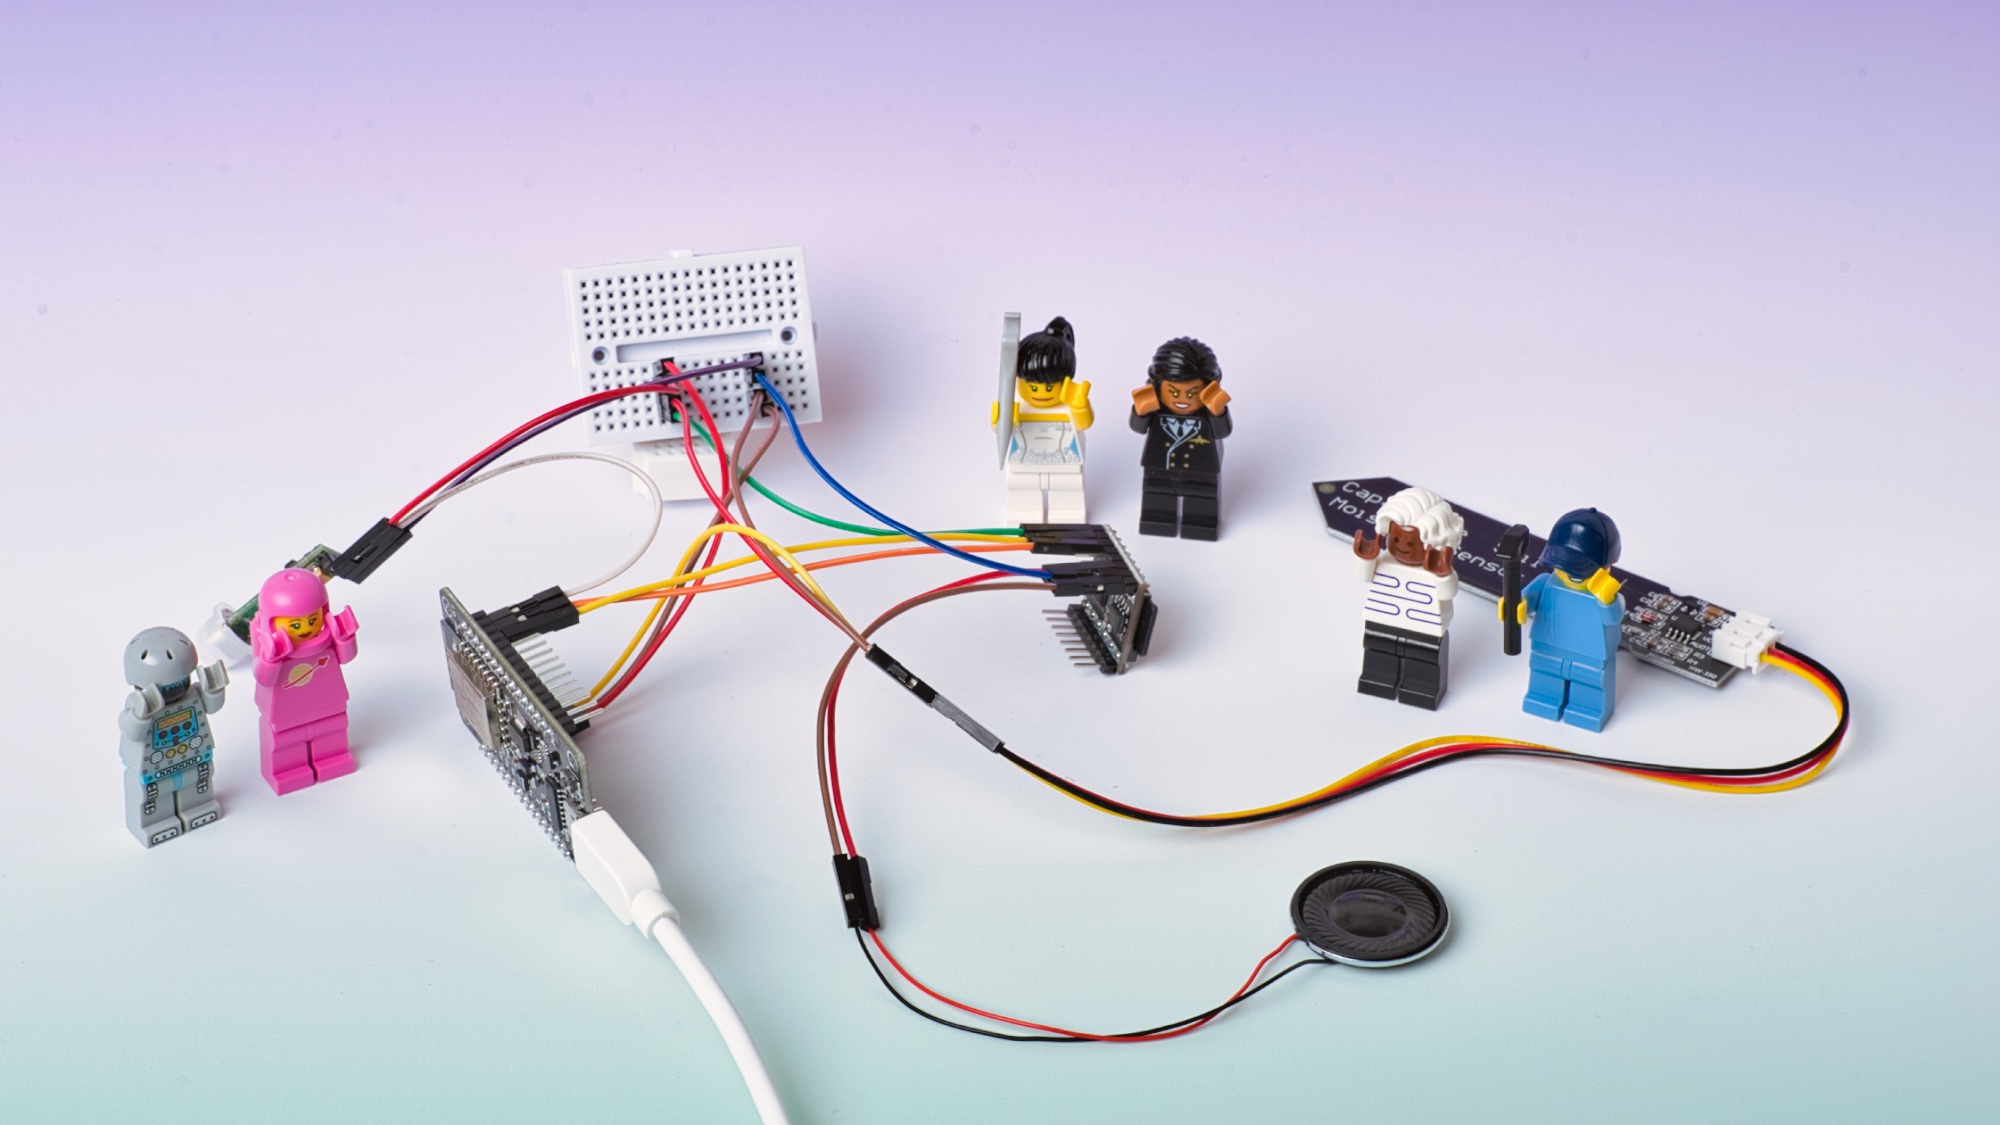
Setting up the hardware
You have already learned about the different components and used them individually. Now we need to connect them all to the microcontroller at the same time 💪.
Make sure your microcontroller is disconnected from the USB power source before making changes to the circuit.
Connect DFPlayer
The speaker should still be connected with the DFPlayer and the DFPlayer should be connected with the microcontroller (at D2 and D3). If you don’t have the connection anymore, please go back to: “connect speaker and DFPlayer”.
Remove the cable from the microcontroller that still connects to G and VCC on the microcontroller.
ESP32 Aufbau
The speaker should still be connected with the DFPlayer and the DFPlayer should be connected with the microcontroller (at G16 and G17). If you don’t have the connection anymore, please go back to: “connect speaker and DFPlayer”.
Remove the cable from the microcontroller that still connects to GND and 5V on the microcontroller.
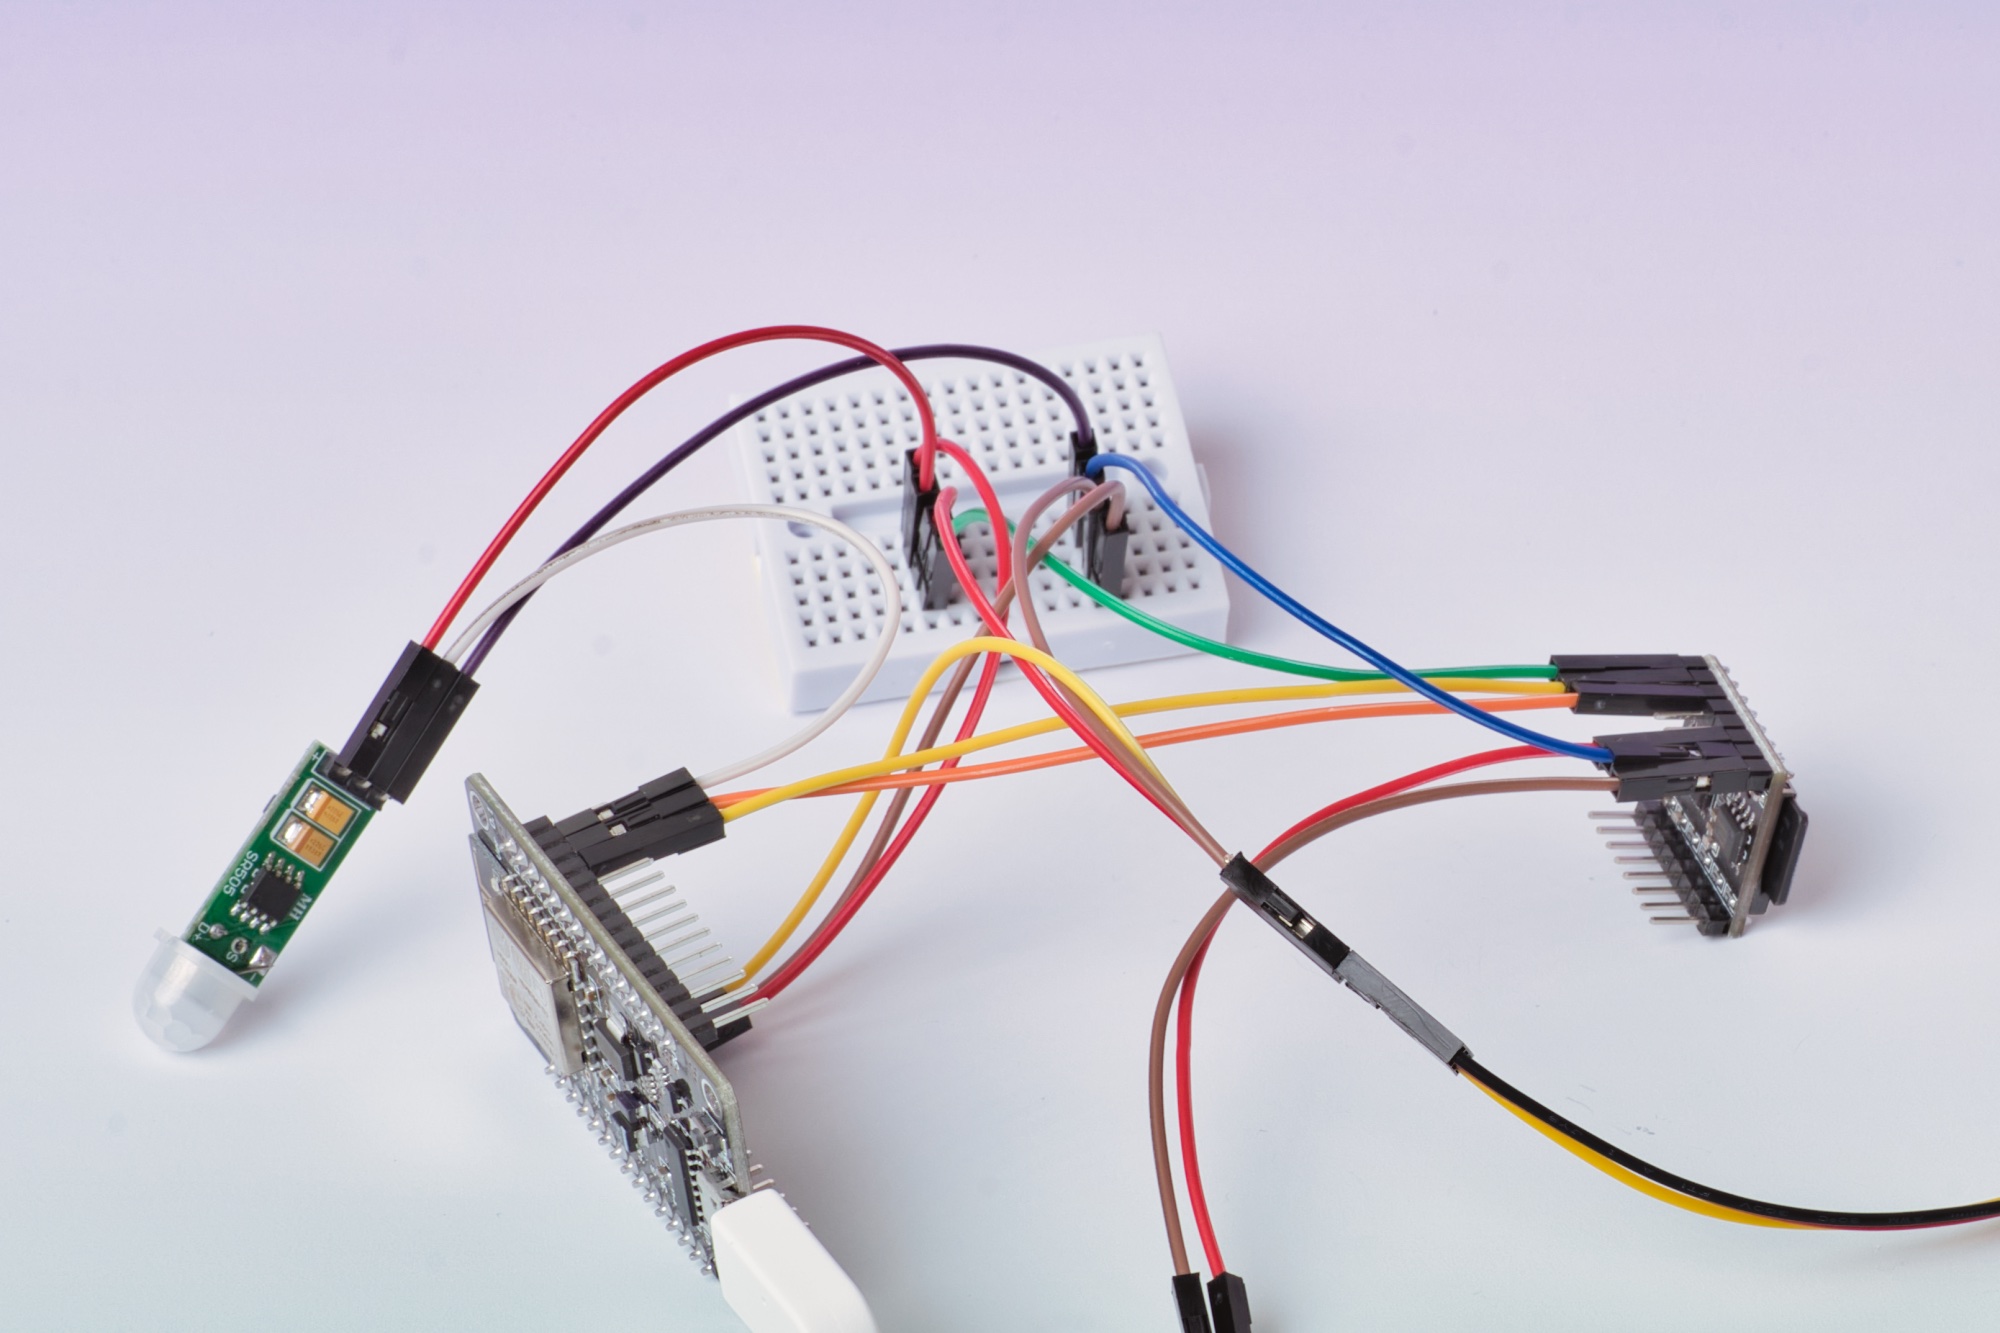
Connect sensors
Now we add the connections for motion sensor and moisture sensor:
- D1 on the microcontroller will be connected to the digital signal on the motion sensor (pin in the middle - on the sensor it says “out”).
- A0 on the microcontroller will be connected to our moisture sensor (yellow wire).
ESP32 setup
- 35 on the microcontroller will be connected to the digital signal on the motion sensor (pin in the middle - on the sensor it says “out”).
- 34 on the microcontroller will be connected to our moisture sensor (yellow wire).
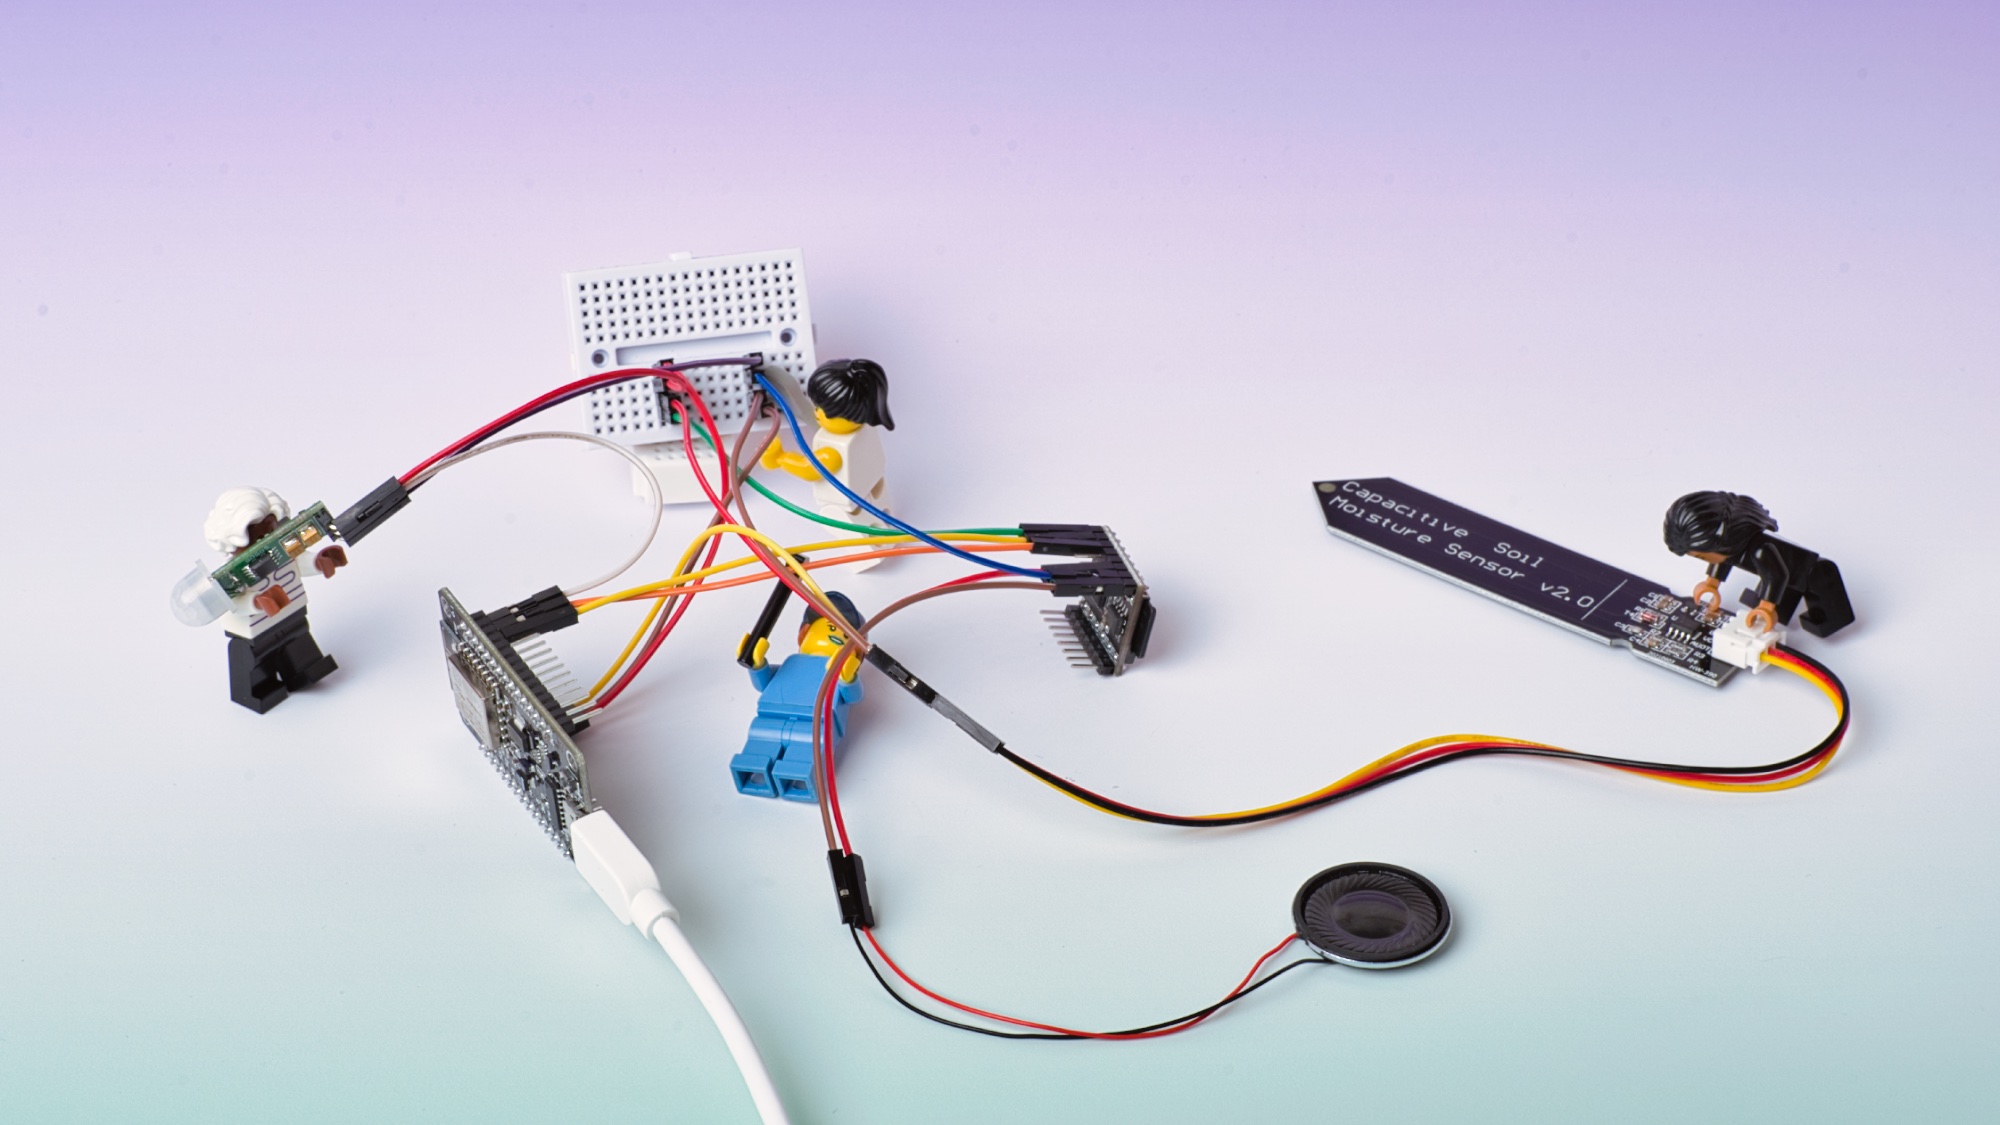
Now all sensors & components are connected to the microcontroller regarding the analog and digital signals.
Adding power to sensors and DFPlayer
Until now we only took care of the analog and digital signals. Now we need to make sure sensors and DFPlayer are powered.
Because all components need power we can connect them together on the breadboard. In our case they will be connected in parallel.
Now the negative terminal cables of all sensors and other components are now plugged next to each other onto the breadboard, so that a current can flow between them. The order of the cables doesn’t matter.
Then the negative terminal/ground cables of all sensors and other components are plugged next to each other on the other side (i.e. separately from the ground cables) onto the breadboard, so that a current can flow between them. The order of the cables doesn’t matter.
At the end you connect all ground cables of the breadboard with only one cable to the ground of the microcontroller. And connect all ground cables on the breadboard with only one cable to the VV of the microcontroller and you are done with the hardware construction 😎!
Now, you just need to add the code and you will be ready to try the cursing plant.
Install libraries
To utilize additional functions of the DFPlayer, you need to install the corresponding library. To do this, go to the Library Manager and search for “DFRobotDFPlayerMini”. Press the button to install it.
Manage libraries on Windows
The Library Manager can be found in the Arduino IDE under Sketch > Include Library > Manage Libraries…

Manage libraries: Mac
In the menu bar, under “Sketch,” you will find “Include Library” > “Manage Libraries.” Here, you can search for the desired library and install it.

Write the code
Note: If you still have any code in the editor from a previous exercise, feel free to delete it
Now we just need the code that reads all the sensors and decides whether to play a sound or not. We want the sound to only play if motion is detected (i.e., someone passes by the plant or 🦖) and the soil is dry. Otherwise, nothing should happen and the plant remains silent.
Add the required libraries:
#include "SoftwareSerial.h"
#include "DFRobotDFPlayerMini.h"
To keep the code organized, we’ll define our pins as constants at the beginning of the program. Constants are similar to variables, but their values do not change during the program execution.
const int RXPin = D2;
const int TXPin = D3;
const int MovePin = D1;
const int SoilMoisturePin = A0;
ESP32 code
const int RXPin = 16;
const int TXPin = 17;
const int MovePin = 35;
const int SoilMoisturePin = 34;
After that, we initialize the SoftwareSerial and DFPlayer by passing the required values as arguments to them.
SoftwareSerial mySoftwareSerial(RXPin, TXPin);
DFRobotDFPlayerMini myDFPlayer;
We also define a few variables that we will use later to store values. You can adjust the threshold value for soil moisture as needed.
int motionDetected; // Motion detected: 1/HIGH (yes) or 0/LOW (no)
int soilMoisture; // Soil moisture: 100 - 800
int moistureThreshold = 400; // Soil moisture threshold
Now we can start the setup. Here we initialize the serial monitor, the software serial, and the DFPlayer:
void setup() {
  mySoftwareSerial.begin(9600);
  Serial.begin(115200);

  pinMode(MovePin, INPUT);

  Serial.println(); // Leere Zeile
  Serial.println("Initialize DFPlayer... (May take 3~5 seconds)");

  if (!myDFPlayer.begin(mySoftwareSerial)) {
    Serial.println("DFPlayer does not start:");
    Serial.println("1. Check the cable!");
    Serial.println("2. Insert an SD card.!");
    while (true);
  }
  Serial.println("DFPlayer started.");

  myDFPlayer.volume(10);  // Set the volume to 10 (0 to 30).
}
And now comes the main part of our program.
The microcontroller will continuously perform the following steps:
- Read the soil moisture level.
- Read a value from the motion sensor.
- Check if the threshold for soil dryness has been reached and if there has been any motion:
- If yes, play a sound.
- If no, do nothing.
Additionally, we have added some delays to allow some time to pass between the readings.
void loop() {
  soilMoisture = analogRead(SoilMoisturePin);
  Serial.println("Soil Moisture: (High value: dry, low value: moist)");
  Serial.println(soilMoisture);

  motionDetected = digitalRead(MovePin);
  Serial.println("Motion Detected");
  Serial.println(motionDetected);

  if (soilMoisture > moistureThreshold && motionDetected == HIGH) {
    myDFPlayer.next();
    delay(11000);
  }
  else {
    Serial.println("No Motion Detected or Soil Not Dry");
    delay(500);
  }

  delay(500);
}
Try it out
- Is motion being detected?
- Is the soil moisture sensor correctly detecting moisture?
- Is the desired sound being played?
Congratulations 🎉 You did a great job. You can be proud of yourself!